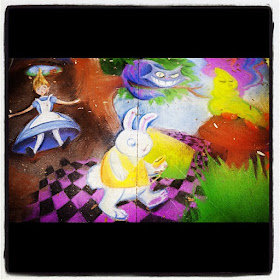
Hi everyone! This weekend was the Sidewalk Art Festival in Savannah. It's a Savannah College of Art and Design event and competition. Students from the college come and create art on the squares of the sidewalk at Forsyth Park. I always like to go the day afterward because it's not as crowded and the art is complete. I couldn't convince Alex to go with me because he's such a homebody, but my friend Vernon humored me on this little excursion. I took tons of great pictures, the lighting was perfect and everything. Then, when I was uploading the pictures for this week's tutorial, I accidentally deleted all of the sidewalk pictures along with everything on my SD card. Talk about a "NNNNOOOOOO!!!!! MY LIFE IS OVER!" moment. I was able to find a few of this year's pictures on Google, but not any of the ones I really liked. I hope you enjoy them anyway.
This week's tutorial is something pretty simple and a great way to give a small refresh to a room. I made a handful of these things because they were so easy and then I wanted to a new one in each room.
Supplies:
Mod Podge ( I used the matte kind. It gives it a really shiny look that I like.)
Light Switch Plate (Got these at Home Depot for no more than 50 cents a piece)
Scissors
Exacto knife (You can use a box cutter in a pinch like I did. I had forgotten my exacto knife at work.)
Scrapbook paper of your choice
Instructions:
1. Open up your light switch plate ( or use the old one you have currently attached to your wall) and take out the screws that come with it. DO NOT THROW THESE AWAY! You will need them to install your oh so pretty new light switch plate later.
2. Apply a generous amount of mod podge to the front of you light switch plate. If you clog the screw holes with mod podge just use a q-tip and clean it out. Easy peasy lemon squeezy!
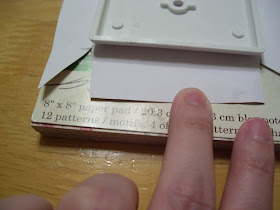
3. Carefully flip over you light switch plate and place it face down on your scrapbook paper that design side down. I pushed it down a little to get the mod podge to adhere to the paper. It dries pretty quick, but I would give it a minute or two before fiddling on with it just to make sure that there is no sliding of the paper.
4. Now, cut your paper to the corner of each light switch. When you fold the paper over the light switch you should have extra paper hanging off the side. This normal so don't panic.
5. Cut of the extra pieces of paper at the edge of the light switch plate.
6. Mod podge the back of the light switch plate and fold over the paper pulling it tight and adhere it to the back of the light switch plate. Do this with all four sides.
7. Using your extacto knife cut an X into the hole where the light switch would actually go.
8. Pull back each tab of paper and mod podge them to the back of the plate.

9. Turn over your switch plate. Oh no! You've covered up your screw holes! That's okay. I got this. Just hold up you light switch plate up to a lamp and you can see where you screw holes used to be. Carefully push your screws through the paper and BAM!!! Instant screw holes! Oh yeah! Now you can mod podge over you light switch cover if you want to give it a shiny look or just leave it. Either one works.
Goodbye dirty, old, outdated light switch!
Hello, totally awesome new retro light switch! One more thing. Make sure you let your light switch cover completely dry before installing or else the paper will peel away from the cover when you try to screw it into the wall. I hope you guys find this helpful! See you tomorrow with Fridays Favorite Finds! YAY!!


Ohhh.. such a good idea! Ill have to do this for my daughters room. Love it :)
ReplyDeleteThank you For sharing
ReplyDeleteHope you will stop by and link up another fabulous project @ craft create and inspire
Claire x